
Views: 0 Author: Site Editor Publish Time: 2026-07-23 Origin: Site
Air suspension systems provide excellent ride quality and load-leveling capabilities, but they demand rigorous precision during service. For auto repair shops, an improper air shock absorber installation often leads to costly comebacks, damaged replacement components, and a tarnished reputation. The stakes are high. A single misstep during depressurization, fitting installation, or electronic calibration can destroy a brand-new unit before the vehicle even leaves the bay.
A common operational failure in many shops is treating an air shock replacement like a standard hydraulic strut job. Replacing a leaking shock while ignoring a burnt-out compressor or failing to calibrate the ride height control module guarantees secondary failures. Technicians must adopt a holistic diagnostic and installation protocol that addresses the entire air management system.
This comprehensive guide details a standardized, evidence-based approach to replacing an air shock absorber. By following these strict procedures, your shop can minimize liability, ensure correct system calibration, and maximize the profitability of complex suspension repairs.

Diagnostic Completeness: Successful installation requires verifying the health of the entire air management system (compressor, valve block, lines) prior to replacing the shock.
Precision Seating: The most common point of post-installation failure is improper seating of the air line, nut, and O-ring assembly into the new unit.
Calibration is Mandatory: Mechanical installation must be followed by electronic ride-height calibration using an advanced scan tool to prevent suspension faults.
Zero Impact Wrenches: Never use an impact wrench on the shock absorber piston rod or top nut, as spinning the rod ruins internal seals and voids warranties.
Risk Mitigation: Never fully lower a vehicle on an unpressurized air shock absorber, as this can fold the bladder and cause immediate catastrophic failure.
Table of Contents
A successful repair resolves the root cause of the failure, not just the symptom. A collapsed air shock is often the final casualty in a chain of system failures. If a technician simply bolts in a new unit without investigating why the original failed, the repair is incomplete. True success means verifying the integrity of the air lines, the efficiency of the compressor, and the functionality of the valve block before any mechanical disassembly begins. You need to look at the entire pneumatic circuit. When a vehicle drops on one corner overnight, the bladder is the obvious culprit, but the valve block might be bleeding pressure back into the system. Diagnosing the full loop prevents the customer from returning three days later with the exact same complaint.
Before putting the vehicle on the lift, technicians must measure and record the ride height at all four corners from the center of the wheel hub to the fender lip. If the system is still partially functional, these measurements establish a critical baseline. This data is essential during the post-installation calibration phase to ensure the suspension control module recognizes the correct vehicle stance and distributes weight evenly. Record these numbers on the repair order. If the vehicle is completely slammed to the bump stops, you will need to pull the factory ride height specifications from your service information system (like ProDemand or Alldata) to use as your target metrics during the final electronic calibration.
Pinpointing the exact source of a pressure loss prevents unnecessary parts replacement. Technicians should utilize bi-directional diagnostic scan tools to monitor system pressure and command individual valves. Physically, use specialized, non-corrosive leak detector fluids on all fittings, air lines, and the shock bladder itself. This systematic approach confirms whether the failure resides in the air shock absorber, a chafed air line, or a sticking valve block. Spray the top mount, the air line connection, and the base of the air spring where it rolls over the lower piston. Look for micro-bubbles that indicate a slow leak. Do not use dish soap, as the chlorides can degrade the rubber and corrode the brass fittings over time.
A prolonged leak in an air shock forces the compressor to run continuously to maintain ride height, eventually burning out its internal motor or degrading its piston ring. Technicians must test the compressor's duty cycle and amperage draw. If the compressor struggles to build pressure within the manufacturer's specified time frame or draws excessive current, it requires concurrent replacement to prevent it from failing days after the new shock is installed. A healthy compressor should typically draw between 15 and 25 amps under load and build system pressure (usually around 12 to 16 bar) within 60 to 90 seconds. If it takes three minutes to lift the car, the compressor is already compromised.
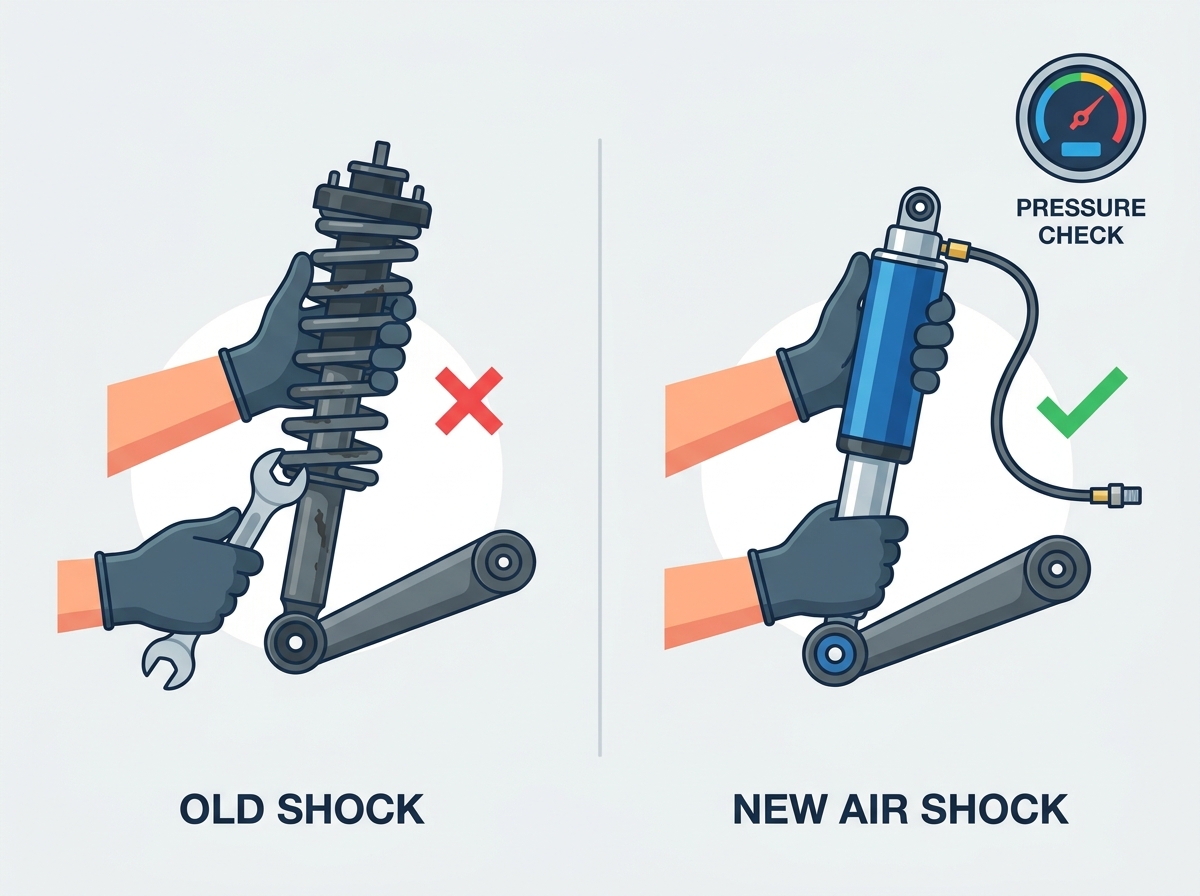
Modern air suspension systems are heavily computerized. A professional shop requires a high-tier, bi-directional scan tool capable of accessing the suspension control module. This tool is mandatory for commanding safe system depressurization, activating the compressor for repressurization, and performing the final electronic ride-height calibration. Basic code readers are insufficient for this level of service. You need equipment that can read live data blocks for individual corner heights, system reservoir pressure, and compressor temperature.
Precision requires the right physical tools. Technicians need specialized air line cutters to ensure perfectly square, burr-free cuts; jagged cuts guarantee micro-leaks. Proper line disconnect tools prevent damage to delicate Voss fittings. Calibrated torque wrenches are non-negotiable for all fasteners. Furthermore, heavy-duty transmission or suspension jacks are required to safely support axles and control arms during the removal process, especially on complex multi-link setups. A dedicated set of pass-through sockets is also highly recommended for holding the shock shaft stationary while torquing the top nut.
The strict use of hand tools for securing the top lock nut is a critical shop rule. Technicians must never use air or electric impact wrenches on the shock absorber piston rod. The rapid rotational force of an impact gun spins the internal piston rod, instantly destroying the delicate internal seals and voiding the manufacturer's warranty before the vehicle hits the ground. Use a wrench and a counter-hold tool. It takes an extra two minutes but saves you from buying a replacement unit out of pocket.
Begin by electronically depressurizing the specific air spring via the OBD2 port using the scan tool. This safely exhausts the air pressure, preventing injury or component damage during disassembly. Once depressurized, proceed with the mechanical removal. Note that chassis-specific complexities exist; for example, replacing rear units on certain multi-link setups may require dropping or lowering the rear axle to gain sufficient clearance without damaging surrounding components.
Connect the scan tool and navigate to the suspension control module.
Select the specific corner or axle and command a depressurization routine.
Verify pressure has dropped to near zero by checking live data.
Safely lift and support the vehicle on a two-post hoist.
Remove the wheel and disconnect the air line fitting from the shock body.
Unbolt the upper mount and lower control arm connections.
Carefully extract the old unit without snagging the ABS or brake lines.
Preparation dictates the seal's integrity. Follow the standard procedure: slide the nut and O-ring onto the air line before inserting it into the shock. Do not force the line into a pre-assembled fitting, as this often pinches the O-ring. Inspect all brass fittings and Voss connectors for manufacturing defects. Keep all components meticulously clean and dry. Strictly avoid oil-based lubricants or sealants on the rubber air sleeve, fittings, or O-rings, as petroleum degrades synthetic rubber.
Mount the upper and lower hardware carefully, ensuring the unit is oriented correctly. Apply the manufacturer's proper torque specifications to the upper piston rod nut using specialized pass-through sockets and counter-holding tools to prevent shaft rotation. Adhere to the golden rule of suspension work: never apply final torque to control arm bushings or lower shock mounts until the vehicle's suspension is loaded at its normal ride height. Torquing at full droop causes bushing wind-up and rapid failure.
Connecting the air line requires a strict protocol. Ensure the line is pushed in to the correct depth to seat properly past the O-ring, preventing micro-leaks. When threading soft brass connectors into the shock body, start the threads by hand to avoid cross-threading. A cross-threaded fitting ruins the new shock housing and requires complete replacement of the unit. If the nylon air line looks scored or scratched at the end, use your specialized cutter to trim off a quarter-inch to ensure a fresh, smooth surface for the new O-ring to seal against.
Repressurization must be staged. Never lower the vehicle completely to the ground on uninflated air shocks. The vehicle must remain partially supported by a lift or jacks while the system fills. If the full weight of the vehicle rests on an empty bladder, the rubber can fold, pinch, or slip off its crimp rings, causing an immediate blowout when pressure is applied. Lower the lift until the tires just touch the ground, then use the scan tool to command the compressor to fill the new springs. Wait until the suspension lifts the vehicle off the hoist arms before fully lowering the lift.
Once the system is pressurized and the vehicle is supporting its own weight, connect the scan tool. Input the baseline measurements recorded earlier (or the manufacturer's specified default values) to calibrate the suspension control module. This electronic handshake ensures the vehicle sits level, distributes weight evenly across all four corners, and responds correctly to dynamic road conditions. Follow the on-screen prompts carefully, as some systems require you to measure from the wheel center to the fender, while others require measurements from the lower control arm to the ground.
Replacing suspension components inherently alters suspension geometry. A comprehensive four-wheel alignment must be performed post-calibration. This corrects any camber, toe, and caster alterations introduced by the new components or the disassembly process, ensuring proper tire wear and predictable handling. Do not skip this step. Even a slight shift in the subframe or control arm during installation will throw the toe out of specification, leading to rapid tire wear and a dissatisfied customer.
Final validation ensures a comeback-free repair. Perform a soapy water test on all disturbed fittings to check for micro-leaks. Monitor the compressor run-time via the scan tool to ensure it shuts off appropriately. Finally, conduct a rigorous road test to verify suspension damping, self-leveling performance under varied loads, and the complete absence of system fault codes. Drive the vehicle over varied surfaces, including speed bumps and tight corners, to ensure the new shocks respond correctly and no warning lights illuminate on the dash.

Shops must navigate the balance between customer budget and repair longevity. Genuine OEM units offer guaranteed fitment and durability but carry a premium price. High-tier aftermarket replacements often match OEM quality and provide excellent value. Economy aftermarket options, however, frequently suffer from inferior rubber compounds and poor valving, leading to premature failures, increased shop warranty claims, and dissatisfied customers.
Part Category | Initial Cost | Expected Longevity | Shop Liability Risk |
|---|---|---|---|
Genuine OEM | High | Excellent (80k+ miles) | Low |
High-Tier Aftermarket | Medium | Very Good (60k-80k miles) | Low to Medium |
Economy Aftermarket | Low | Poor (Under 30k miles) | High |
For older vehicles facing complete air system failure, offering coil spring conversion kits presents a viable business case. Conversions save the customer significant money by eliminating the compressor, valve block, and air springs entirely. However, service advisors must clearly explain the trade-offs: the customer will lose the OEM ride quality, automatic load-leveling capabilities, and adjustable ride height. Make sure the customer signs a waiver acknowledging these changes in vehicle dynamics before proceeding with a conversion.
Selecting unverified, low-cost replacement parts directly increases a shop's liability. Cheap units are prone to premature bladder rot, faulty internal valving, or incorrect internal ride-height sensors. When these parts fail, the shop absorbs the labor cost of the warranty repair and suffers reputational damage. Standardizing on reputable brands protects the shop's bottom line. Stick to known manufacturers with robust warranty programs and proven track records in the suspension industry.
Failing to replace a weakened compressor during the shock installation is a critical error. A compressor that has been overworking to compensate for a leaking shock is already compromised. Installing a new shock seals the system, but the damaged compressor will likely fail within 30 days, resulting in an angry customer returning with a vehicle that won't lift. Always test the compressor output and replace the compressor relay as a standard preventative measure during any major air suspension repair.
Utilizing an impact gun on the top nut spins the internal piston within the shock cylinder at high speeds. This friction instantly destroys the internal hydraulic or air seals. The result is an immediate leak and a ruined unit. Always use hand tools and proper counter-holding sockets. Train your technicians to keep the impact guns in the toolbox when assembling strut mounts.
Rushed fitting insertions or using air lines with jagged cuts cause slow micro-leaks. These leaks may not be immediately obvious but will slowly drain the system pressure overnight, forcing the compressor to run excessively upon startup and eventually burning it out. Always use proper line cutters and seat fittings carefully. Double-check your work with a leak detection fluid before putting the vehicle back on the ground.
Threading soft brass fittings into aluminum or plastic shock housings requires care. To mitigate cross-threading, always start the threads by hand for at least three full turns before using a wrench. If resistance is felt immediately, back it out and realign. Stripping these threads ruins the entire shock assembly. Take your time and ensure the fitting goes in smoothly.
Installing an air shock absorber correctly requires more than simply replacing a worn component. By following proper diagnostic procedures, installation steps, electronic calibration, and final system testing, technicians can improve repair quality, prevent premature failures, and ensure safe, long-lasting air suspension performance.
Choosing high-quality replacement parts is equally important for long-term reliability. Tianyi specializes in manufacturing premium air suspension components, including air shock absorbers, air springs, compressors, and complete suspension solutions for passenger vehicles and commercial applications. With strict quality control, OEM/ODM manufacturing capabilities, and global supply experience, Tianyi provides reliable suspension products trusted by customers worldwide.
Always inspect the entire air suspension system before installing a new air shock absorber.
Follow the correct depressurization, installation, and calibration procedures to avoid unnecessary component damage.
Use high-quality replacement parts that meet OEM specifications for reliable long-term performance.
Complete leak testing, electronic calibration, and a road test before returning the vehicle to service.
Before selecting an air suspension parts supplier, evaluate their manufacturing expertise, product quality, technical support, and supply chain reliability to ensure dependable performance and long-term value.
A: Book times vary significantly. Front units typically take 1.5 to 2.5 hours per side. Rear units can range from 2 to 4 hours per side, especially on complex chassis where dropping the rear axle or major suspension components is required for clearance.
A: Yes. A bi-directional scan tool is mandatory for safely depressurizing the system before removal, commanding the compressor to fill the new units, and performing the final electronic ride-height calibration.
A: A constantly running compressor usually indicates a micro-leak at the new air line fitting, a pinched O-ring, or a pre-existing compressor relay that has fused closed due to overworking prior to the repair.
A: Industry standards dictate replacing them in axle pairs. This ensures balanced damping, consistent ride height, and uniform system wear, preventing unpredictable handling dynamics.
A: Using an impact wrench spins the internal shock shaft at high speeds. This friction shreds the delicate internal seals, causing immediate fluid or air leaks and instantly voiding the manufacturer's warranty.
A: Lowering the full weight of the vehicle onto unpressurized air shocks causes the rubber bladder to fold, crimp, or slip off its mounting rings, leading to an immediate blowout when pressure is eventually applied.
A: You must use a specialized tube cutter to achieve a perfectly square, 90-degree, burr-free cut. Using side cutters or a knife creates a jagged edge that will damage the O-ring and cause connection leaks.


